
There are two excellent solutions for people who want to run different operating systems within the macOS world: Parallels and VMWare Fusion. I’ve used both and personally am now a big fan of Fusion, but ever since Apple switched to a standard Intel base for its computers, Windows has been able to run native – and fast – on a variety of hardware.
What’s more amazing is that in both cases, you can configure the software to let you access just about every facet of your Mac system, meaning that the virtual machines can run fully feature-rich with almost no penalties for being in a virtual machine / virtualized world. Very cool! On my main MacBook Pro I have both Windows 10 and Ubuntu Linux set up as virtual machines and they both work splendidly.
Fortunately, the method of adding access to your Mac webcam from within VMware Fusion is the same whether you’re running Linux, Windows 10, Windows 8 or somehow have Win95 virtualized. Tho I don’t recommend the latter. 
Before I started I just tested to see if the camera would already be connected by launching Camera in Win10. It definitely wasn’t happy:

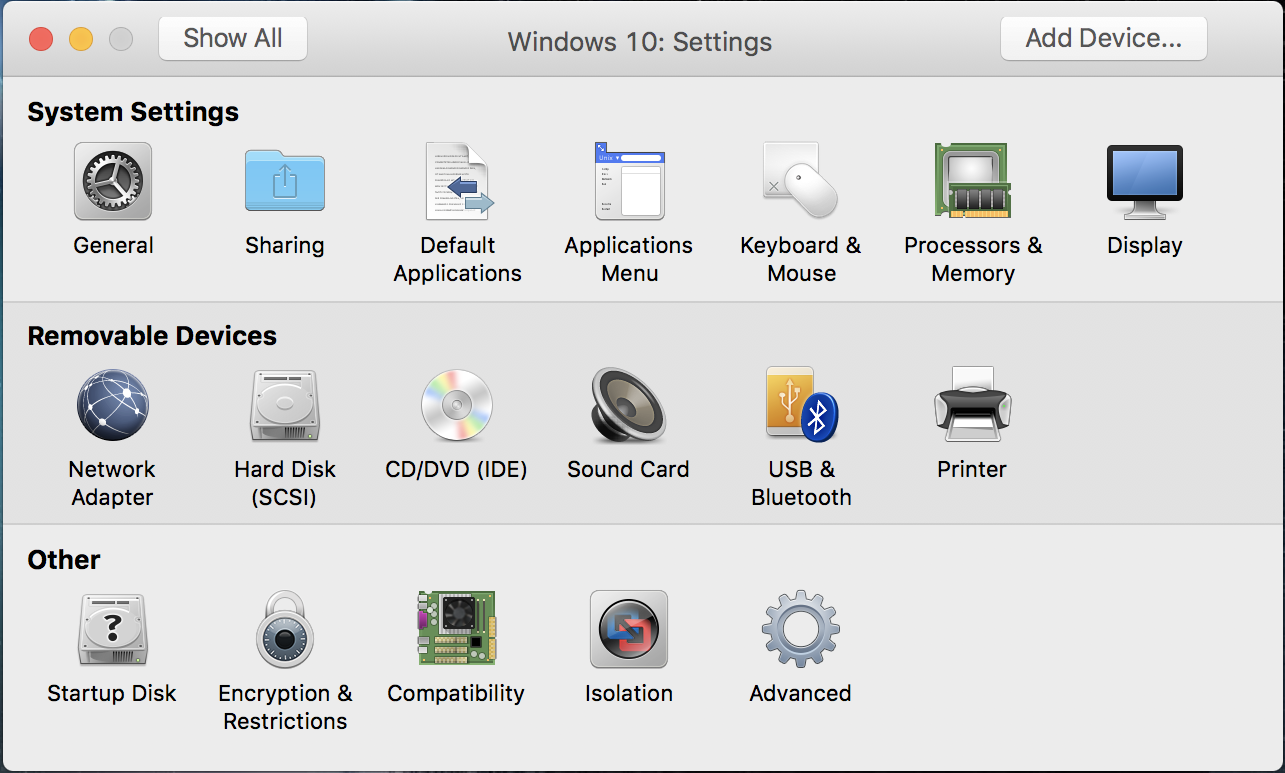
To fix this, it’s important to know that any time you want to make a change to a virtual machine, you have to shut down the operating system. Linux or Windows, it’ll need to reboot with the new configuration, not just “un-pause”. Do that, then go into Settings… on your VMWare Fusion program. You’ll see this collection of icons:
But you don’t want to change or click on any of the icons! Instead, click on the “Add Device…” button on the top right of the window.
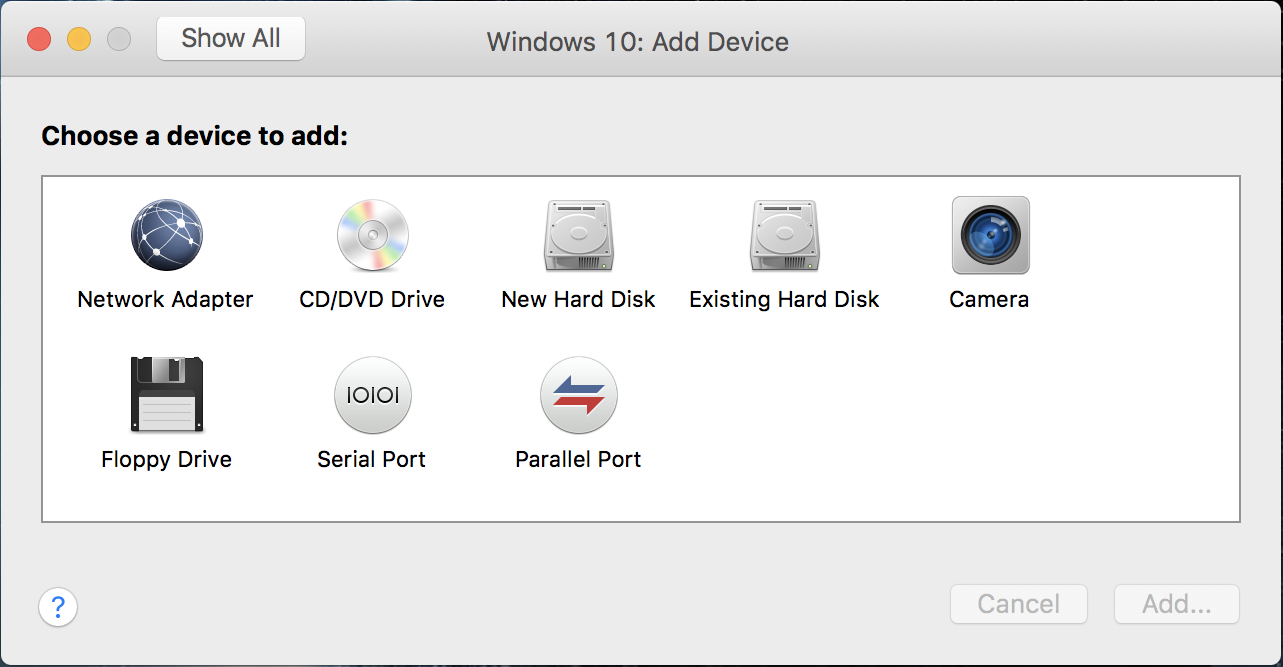
There’s what you want! Gaze in amazement that they still have support for floppy drives and then click on “Camera” to add it to that virtual machine.
Now you’ll be able to choose between the different cameras available, which reveals something interesting about how macOS is set up:
There are two camera devices even though my MacBook Pro has one camera. Weird. Choose “Default Camera” and click on the red circle on the top left (hey VMWare, this window could do with an “OK” button!) and you should be done.
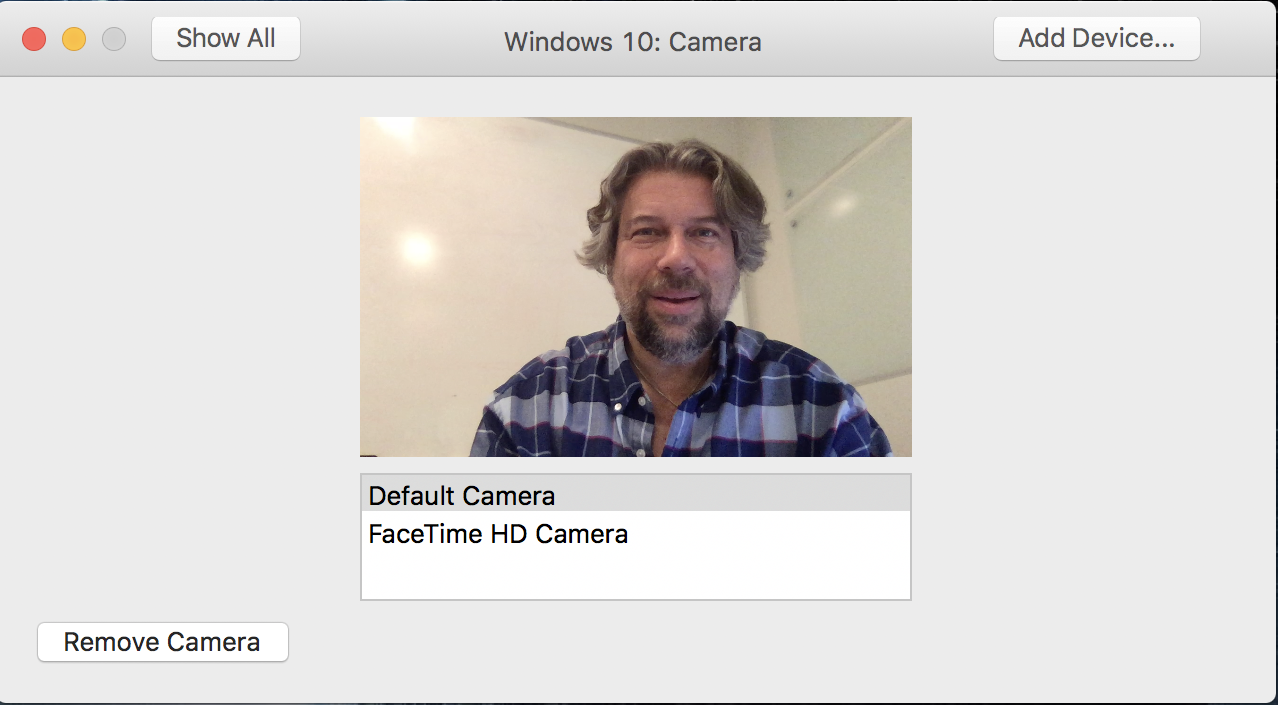
Now launch your OS within your virtual machine – in your case, Windows 8 – and you should now see the camera show up as one of the devices on the Virtual Machine menu, as shown:

There aren’t any real settings, so don’t bother selecting it. Instead, just launch the Windows program that requires the camera connection and it should work! You can see that when I launch Camera:

Hopefully you don’t see me in your camera view! But otherwise, definitely a lot better than an error message.
The post Add a webcam camera to a VMWare Fusion virtual machine? appeared first on Ask Dave Taylor.


